
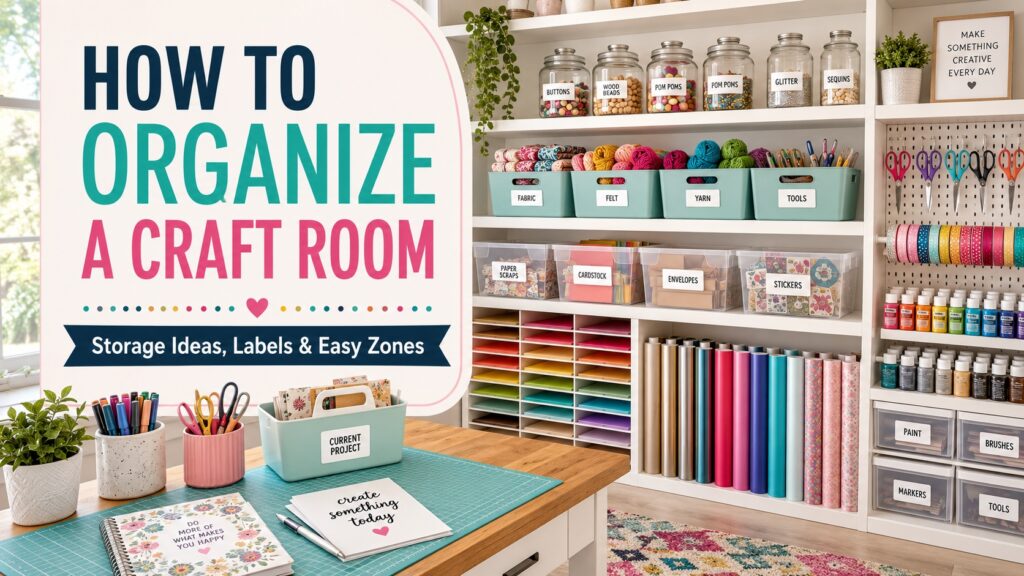
TLDR
- Sort supplies before buying storage containers.
- Organize materials according to how you use them, not only by appearance.
- Keep everyday tools near the main work surface.
- Use walls, doors, shelves, and rolling carts to save floor space.
- Label bins specifically so supplies are easy to find and return.
- Create a separate place for unfinished projects.
- Leave part of the worktable empty and ready for the next project.
Craft rooms tend to collect possibilities.
A ribbon might work for a future wreath. The scrap of patterned paper is too good to throw away. And that unfinished project is not abandoned. It is simply waiting for the right afternoon, possibly three years from now.
The problem is not having a lot of craft supplies. The problem is losing usable materials inside a room that no longer gives you enough space to make anything.
Learning how to organize a craft room starts with understanding your actual creative process. The best system is not necessarily the prettiest one. It is the one that helps you find supplies, begin projects, clean up, and return to unfinished work without searching through five identical boxes.
Craft Room Organization at a Glance
| Craft Supply | Recommended Storage |
|---|---|
| Paper and cardstock | Vertical files or shallow drawers |
| Vinyl sheets | Flat drawers, folders, or upright sleeves |
| Fabric | Folded bins, drawers, or hanging storage |
| Yarn | Open cubbies or breathable bins |
| Ribbon | Dowels, divided drawers, or labeled boxes |
| Beads and buttons | Small compartment organizers |
| Paint bottles | Shallow shelves or tiered racks |
| Brushes and pens | Cups, caddies, or divided drawers |
| Scissors and hand tools | Pegboard or shallow drawer |
| Cutting machines | Stable work surface with nearby material storage |
| Unfinished projects | Separate project bins or rolling carts |
| Extra inventory | Labeled backstock containers |
These are starting points. A quilter, painter, scrapbooker, and sticker maker will each need a different version of the room.
Start by Removing Everything That Does Not Belong
It is difficult to organize a craft room while working around broken tools, dried paint, empty packages, and materials you no longer use.
Begin with one small area, such as a drawer, cabinet, shelf, or section of the worktable. Empty it and divide the contents into simple groups:
- Keep in the craft room
- Move somewhere else
- Donate
- Sell
- Recycle
- Throw away
- Decide later
The “decide later” category should be limited to one box. Without a limit, it becomes a new storage system for avoiding decisions.
Check markers, pens, glue, paint, and adhesive products before returning them to storage. Remove tools that no longer work. Combine duplicate packages where practical.
The goal is not to own as few supplies as possible. It is to make room for materials you are genuinely likely to use.
Current craft-room organization guides commonly recommend decluttering before planning storage because containers cannot solve the problem of keeping too many unusable or unrelated materials.
Organize the Room Around Activities
A useful craft room should support the steps involved in making something.
Divide the space into zones based on your common activities. Possible zones include:
- Cutting and measuring
- Painting
- Sewing
- Paper crafts
- Vinyl and machine cutting
- Jewelry making
- Packaging and shipping
- Photography
- Computer and design work
- Project assembly
The zones do not need physical walls between them. A zone may be one drawer, a section of pegboard, or a rolling cart stored beside the table.
Keep tools near the place where they are used. If the paper trimmer is stored across the room from the cardstock, every project creates unnecessary movement and leaves more chances for supplies to land on the wrong surface.
A small room may need flexible zones. A rolling cart can hold painting materials one week and party supplies the next. The main worktable can support several activities as long as nearby storage makes each transition easy.
Keep the Main Work Surface Clear
An empty worktable is useful storage for exactly one thing: your current project.
Avoid treating it as the permanent home for paper stacks, unopened packages, tools, finished work, and materials you intend to sort later. Once the surface fills up, starting a project requires cleaning before creating.
Keep only a few daily tools on the table, such as:
- Scissors
- Ruler
- Pencil
- Cutting mat
- Frequently used adhesive
- Small waste container
Store less frequently used materials nearby but off the surface.
Create a small landing area for newly purchased supplies. This prevents shopping bags and delivery boxes from taking over the worktable. Empty the landing area on a regular schedule and move each item to its permanent location.
Store Frequently Used Supplies Within Reach
The materials used every week should be easier to reach than the supplies used twice a year.
Place everyday tools between waist and eye level. Store occasional and seasonal materials on higher or lower shelves.
A simple priority system works well:
Daily supplies: Keep on the work surface, pegboard, or nearest drawer.
Regular supplies: Store in nearby cabinets, carts, or shelves.
Occasional supplies: Place in labeled bins on upper or lower shelves.
Seasonal and backstock materials: Store farther from the main workspace.
This system reduces the amount of reaching, moving, and digging required to complete common projects.
Open shelves and pegboards are especially useful for frequently used tools because they keep supplies visible. Closed cabinets are better for backstock, visual clutter, delicate materials, and items that need protection from dust or sunlight.
Use Vertical Space
The walls, doors, and sides of cabinets can hold supplies without reducing workspace.
A pegboard above the worktable can store:
- Scissors
- Rulers
- Cutting tools
- Small baskets
- Paintbrushes
- Tape
- Thread
- Frequently used hand tools
Pegboards work best when they hold core tools rather than every object in the room. Leave some space between items so tools remain easy to remove and return.
Other vertical storage options include:
- Floating shelves
- Wall-mounted paper files
- Door organizers
- Magnetic strips
- Hooks
- Rails with hanging cups
- Tall cube shelves
- Ribbon dowels
- Thread racks
Store heavier items lower and secure shelves, pegboards, and wall systems correctly for the surface and expected load.
Craft-room storage guides consistently recommend using wall space, pegboards, hooks, rails, shelves, and door organizers to protect work surfaces and make tools easier to reach.
Label Containers Clearly
A container does not create organization when nobody knows what belongs inside it.
Labels make storage easier to scan and reduce the chance that a carefully sorted system slowly turns into a collection of miscellaneous bins.
Good craft-room categories include:
- Adhesives
- Acrylic Paint
- Watercolor
- Vinyl Scraps
- Permanent Vinyl
- Heat Transfer Vinyl
- Cardstock
- Patterned Paper
- Fabric Scraps
- Ribbon
- Beads
- Findings
- Cutting Tools
- Packaging Supplies
- Works in Progress
Use language that matches how you naturally search for an item. “Paper Crafts” may be too broad if it includes cardstock, envelopes, specialty paper, stickers, stamps, and cutting dies.
Custom vinyl stickers can turn plain boxes, drawer fronts, carts, and storage bins into a coordinated labeling system. Use readable text, simple icons, or colors that match the room.
For a system with many small categories, custom sticker sheets allow several kiss-cut labels to be printed together on one backing sheet. One sheet could include labels for different paint types, vinyl finishes, paper weights, tools, or project stages.
CustomStickers.com recommends using specific labels that match the way people search for supplies rather than relying on broad categories such as “craft stuff.” Clear labels also make shared spaces easier for other people to maintain.
Make Labels Easy to Change
Craft collections change over time. The bin that holds wedding supplies today may store holiday ribbon next year.
For frequently changing categories, place the sticker on:
- A removable label holder
- A plastic card
- A metal clip
- A drawer insert
- A smooth tag tied to the basket
This lets you update the label without replacing the container.
Permanent labels work well for stable categories such as scissors, paintbrushes, glue, cardstock, and sewing tools. Changeable labels are better for client orders, seasonal products, event supplies, and short-term project bins.
Do not label every individual object. Focus on decision points: bins that look alike, materials that are often mixed up, and locations other people may need to use.
Organize Paper Vertically or in Shallow Layers
Paper becomes difficult to use when it is stacked too deeply.
Large stacks hide colors, damage corners, and make it hard to remove one sheet without disturbing everything above it.
Use vertical files, magazine holders, paper racks, document boxes, or shallow drawers. Sort paper according to the way you choose it:
- By color
- By size
- By material
- By weight
- By pattern
- By brand
- By project type
Keep full sheets separate from scraps. A small divided file can organize usable scraps by color, while tiny pieces can be recycled.
Store specialty paper in protective sleeves when fingerprints, dust, or scratches could affect the finish.
Vinyl sheets can also be stored flat in drawers or upright inside folders. Avoid tightly folding or crushing materials that need to feed smoothly through a cutting machine.
Use Small Containers Inside Large Storage
A cabinet labeled “Jewelry Supplies” is still difficult to use when beads, findings, wire, tools, and clasps are all mixed together.
Place smaller containers inside drawers, shelves, and cabinets. Hardware organizers, tackle boxes, divided trays, zipper pouches, and shallow bins work well for small materials.
Choose compartments based on the supply:
- Beads and buttons need small divided sections.
- Fabric and yarn need room to breathe.
- Paint bottles should remain easy to see and remove.
- Sharp tools need protected storage.
- Paper needs flat support.
- Ribbon should be contained without becoming crushed.
Clear containers can help you see inventory quickly. Opaque containers reduce visual clutter but require better labels.
Stackable storage saves space, but avoid building towers that require removing five boxes to reach the one at the bottom. Materials used regularly should slide out or lift out independently.
Create a Project-in-Progress System
Unfinished projects create some of the worst craft-room clutter because they include several materials that temporarily do not belong in their normal storage locations.
Give each active project its own bin, tray, box, folder, or cart.
Include:
- The project materials
- Special tools
- Written notes
- Measurements
- Reference images
- The next step
Label the container with the project name and, when useful, a target date.
A “start here” bin can hold the project you plan to work on next. This is more useful than spreading several possible projects across the worktable.
Limit the number of active project bins. When the system fills up, complete, pause, or dismantle something before beginning another large project.
Use a Rolling Cart for Flexible Storage
A rolling cart works well when the room supports several types of crafts or when supplies need to move between rooms.
Assign one cart to:
- Painting
- Sewing
- Cutting-machine tools
- Children’s crafts
- Current projects
- Packaging orders
- Photography supplies
Store the cart beside the worktable while using it, then roll it away when the project is finished.
Do not let a cart become a mobile version of the miscellaneous drawer. Label each level and give loose tools smaller containers.
For people who craft at a dining table or shared desk, a cart can function as a compact craft room that can be packed away after each session.
Organize Ribbon, Yarn, and Fabric Separately
Soft materials require different storage from paper and tools.
Ribbon
Store ribbon on dowels, inside divided drawers, or in labeled boxes. Keep loose lengths wrapped around flat cards to prevent tangling.
Yarn
Open cubbies and breathable bins make skeins easy to see. Sort yarn by weight, fiber, project, or color depending on how you use it.
Fabric
Fold fabric consistently so stacks remain stable and easy to scan. Small fabric pieces can be stored in bins by type or color. Longer pieces may be wrapped around boards or placed in hanging storage.
Avoid forcing fabric and yarn into containers that are too small. Compression can create wrinkles and make the collection harder to browse.
Store Paints and Adhesives Carefully
Paint and adhesive products should be stored according to their manufacturer instructions.
Keep lids and caps secure. Remove containers that have dried out, separated beyond recovery, or become damaged.
Small paint bottles are easier to manage in shallow shelves, tiered racks, drawers, or organizers that allow the label or color to remain visible.
Group adhesives by type:
- Glue sticks
- Craft glue
- Fabric adhesive
- Spray adhesive
- Tape runners
- Hot-glue supplies
- Epoxy or specialty products
Store sharp blades, hot tools, chemicals, and hazardous materials where children and pets cannot access them. Keep safety information and protective equipment near the supplies that require them.
Create a Dedicated Cutting and Machine Area
Electronic cutting machines, printers, sewing machines, heat presses, and similar equipment need stable surfaces and enough room to operate.
Do not store paper, vinyl, tools, or decor where they block:
- Material feed paths
- Cooling vents
- Power switches
- Cord access
- Machine lids
- Moving parts
Keep compatible tools and consumables nearby. A cutting-machine station might include blades, mats, scrapers, vinyl, transfer tape, and weeding tools.
Label replacement parts clearly. Blades and mats that look similar may be designed for different materials or machines.
Use cable clips, sleeves, or labeled cords to keep power and data cables from becoming tangled behind the table.
Make a Place for Finished Projects
Completed work needs somewhere to go.
Without a finished-project area, completed pieces remain on the worktable and compete with the next project.
Depending on the craft, use:
- Drying racks
- Flat drawers
- Shelves
- Hanging rails
- Portfolio cases
- Shipping bins
- Photography tables
- Display shelves
If the project is intended for sale or shipment, move it into inventory or packaging storage as soon as it is complete.
If it is waiting for photography, finishing, framing, or delivery, label that stage clearly. “Finished” should not become another broad pile of items that still need several steps.
Organize Craft Business Supplies Separately
A craft room used for a small business needs a clear line between creative supplies and order-fulfillment materials.
Create separate areas for:
- Raw materials
- Finished inventory
- Packaging
- Shipping labels
- Customer inserts
- Returns
- Damaged products
- Photography samples
- Wholesale orders
Label inventory by the information that matters to your workflow, such as SKU, material, size, color, collection, or production stage.
Keep customer orders separate from personal projects. A dedicated order shelf, cart, or bin reduces the risk of using reserved materials or misplacing completed products.
The CustomStickers.com guide to using stickers for organization explains how labeled bins can work as a simple inventory system for materials, packaging, colors, and batches.
Organize a Small Craft Room or Craft Corner
You do not need a dedicated room to create a useful craft space.
A closet, cabinet, corner, desk, or rolling cart can work when storage is planned vertically and each supply earns its place.
For a small craft area:
- Use the back of a door.
- Install shelves above the desk.
- Choose a desk with drawers.
- Store project-specific supplies in portable boxes.
- Keep backstock somewhere else.
- Use one rolling cart for frequently used materials.
- Limit the number of active projects.
- Protect part of the desk as permanent working space.
Avoid buying miniature containers for everything simply because the room is small. Too many small boxes can create more searching and stacking.
Choose fewer containers with clear, useful divisions.
Organize on a Budget
Craft-room organization does not require a wall of new furniture.
Repurpose:
- Shoe boxes
- Shipping boxes
- Food jars
- Drawer dividers
- Magazine files
- Toolboxes
- Spice racks
- Tackle boxes
- Kitchen carts
- Mason jars
- Over-the-door organizers
Use containers you already own before buying more. Once the categories are stable, replace the pieces that genuinely do not work.
A plain reused box can look much more intentional with a clean label. And because the system is tested before you spend much money, you are less likely to buy storage that looks good but does not fit your supplies.
Current craft-storage guides recommend looking beyond products marketed specifically for crafts. Tool organizers, kitchen racks, shoe storage, makeup containers, and reused packaging can all solve specific storage problems.
Create a Short Cleanup Routine
A craft room will become messy while it is being used. That is normal.
The goal is not to avoid making a mess. It is to make cleanup straightforward.
At the end of each session:
- Throw away scraps and packaging.
- Return shared tools.
- Close paints, pens, and adhesives.
- Place unfinished materials in the project bin.
- Clear the main work surface.
- Restock anything that is running low.
- Leave the next task ready when possible.
Set a timer for 10 or 15 minutes. A short reset completed regularly is more realistic than waiting for the room to become unusable and then losing an entire weekend to organizing it.
A daily or session-based reset is also recommended in established craft-room organization guidance because returning supplies immediately prevents small piles from becoming larger room-wide problems.
Common Craft Room Organization Mistakes
Buying Containers Before Sorting
Storage should fit the supplies. Buying containers first can leave you with boxes that are the wrong shape, size, or quantity.
Using Categories That Are Too Broad
“Craft Supplies” and “Miscellaneous” do not tell you where anything belongs.
Hiding Everything
Closed storage can look calm, but materials may be forgotten. Keep regular supplies visible or clearly labeled.
Displaying Everything
Open shelves can also create visual clutter and collect dust. Use a balance of open and closed storage.
Keeping Too Many Active Projects
Several unfinished projects can consume every available surface. Give each one a container and set a reasonable limit.
Filling Every Empty Space
Leave room for new materials, changing interests, and the actual work of crafting.
Creating a System That Is Difficult to Maintain
If returning one tool requires moving several bins, opening a cabinet, and reorganizing a drawer, the tool will probably remain on the table.
Craft Room Organization Checklist
Before considering the room finished, confirm that:
- Unusable supplies have been removed.
- Materials are grouped by activity or category.
- Daily tools are within reach.
- Every bin and drawer has a clear purpose.
- Labels are readable from a normal distance.
- Paper and vinyl are protected from bending.
- Small parts have divided storage.
- Sharp and hazardous supplies are secure.
- Unfinished projects have separate containers.
- Finished projects have a destination.
- Business inventory is separate from personal supplies.
- The main work surface is mostly clear.
- The organization system can be reset quickly.
Frequently Asked Questions
What Is the Best Way to Organize a Craft Room?
Sort supplies first, group them by how they are used, and place frequently used tools close to the main work area. Use labeled containers, vertical storage, and separate bins for active projects.
How Do I Organize a Craft Room With Too Much Stuff?
Begin with one drawer or shelf. Remove unusable materials, duplicates, and supplies that belong elsewhere. Limit undecided items to one container and organize the materials you actually plan to keep.
Should Craft Supplies Be Stored in Clear Containers?
Clear containers make supplies easy to identify, but they can create visual clutter. Opaque bins work equally well when they have clear labels. Many rooms benefit from using both.
How Do I Organize Craft Paper?
Store full sheets vertically in files or flat inside shallow drawers. Sort them by color, size, material, or project type. Keep scraps in a separate divided container.
How Can I Organize a Craft Room Cheaply?
Reuse jars, boxes, tool organizers, kitchen racks, shoe storage, and containers you already own. Test the system before buying matching furniture or specialty organizers.
What Should Stay on a Craft Table?
Keep only the tools you use constantly, such as scissors, a ruler, cutting mat, pencil, and basic adhesive. Store project materials in a separate bin so the table can be cleared between sessions.
Build a Room That Helps You Make Things
The purpose of a craft room is not to look untouched.
It should make it easier to begin a project, find the right tool, protect valuable materials, and clean up when you are finished.
Start with your real habits. Store supplies where you naturally use them. Label anything that is easy to confuse. Give unfinished projects a home, and resist filling every shelf simply because it is available.
A good craft room may still become messy during a productive afternoon. But when the system works, the mess has somewhere to go when the project is done.