
TLDR
Garage organization works when every category has a clear home and frequently used items are easy to reach.
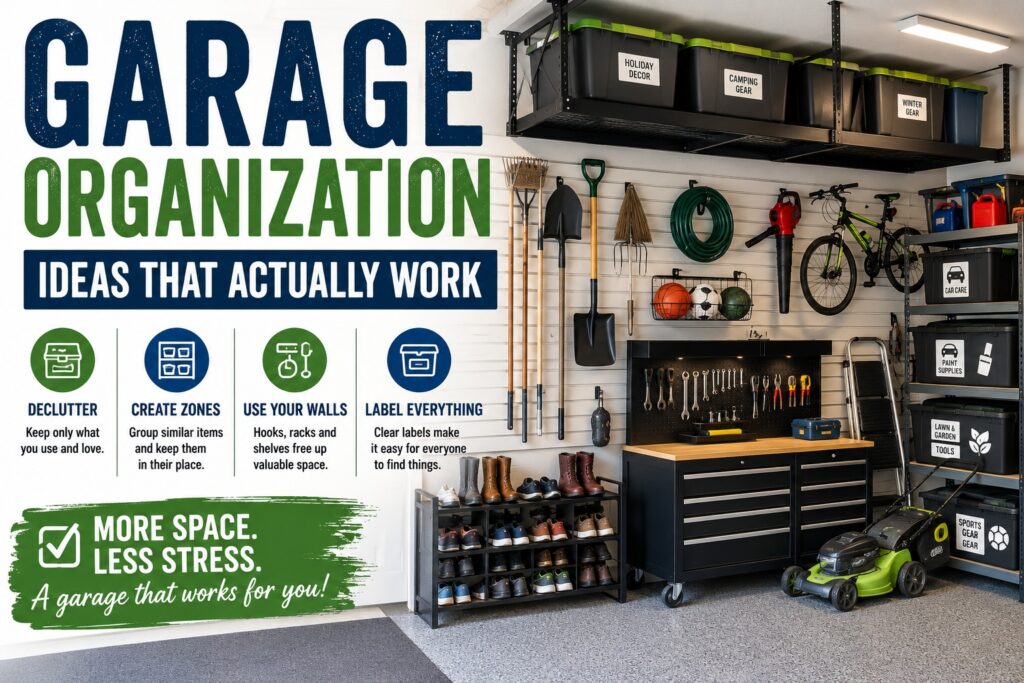
Start by deciding what the garage needs to do. Remove obvious clutter, create storage zones, use the walls before filling the floor, and label bins clearly. Keep everyday items near the door and seasonal items higher or farther back.
The goal is not a showroom garage. It is a system your household can maintain without holding a planning meeting every time someone puts away a basketball.
A garage can look organized for one weekend and return to chaos by the end of the month.
That usually happens because the cleanup focused on where things would fit rather than how people actually use them. Holiday decorations were placed in front of the lawn mower. Frequently used tools were packed into identical bins. The floor looked clear, but finding anything required opening six boxes and moving a bicycle.
The best garage organization ideas that actually work are based on access, frequency, and simple categories. Everything needs a reasonable place, and putting it away should take less effort than leaving it on the floor.
Here is how to build a garage storage system that stays useful after the initial cleanup.
Decide What the Garage Needs to Do
Before buying shelves or storage bins, decide what functions the garage must support.
Your list might include:
- Parking one or two vehicles
- Storing lawn and garden equipment
- Keeping tools accessible
- Creating a workbench area
- Organizing sports equipment
- Holding seasonal decorations
- Storing automotive supplies
- Providing a household overflow area
- Creating space for bicycles
- Keeping recycling and trash contained
Be realistic about the available space. A two-car garage cannot comfortably function as a parking area, woodworking shop, home gym, bicycle store, warehouse, and holding area for every object the household has ever owned.
Choose the main functions first. Storage decisions become easier once you know what the garage is supposed to accomplish.
Empty the Floor Before Organizing the Shelves
A garage feels crowded when too many objects live on the floor.
Start by clearing enough open space to sort. You do not necessarily need to empty the entire garage at once. Working one wall or category at a time is often more manageable.
Create five groups:
- Keep in the garage
- Move somewhere else
- Donate or sell
- Dispose of properly
- Unsure
Use the “unsure” group carefully. One small section is reasonable. Half the driveway covered in items waiting for a future decision is just a second garage with worse weather protection.
Remove broken tools, empty packaging, expired products, outgrown sports equipment, unidentified hardware, and materials left over from projects you know you will not finish.
The less you keep, the easier every later step becomes.
Create Garage Storage Zones
Zones prevent unrelated items from spreading across every available shelf.
Instead of organizing by where an item happens to fit, group items by how they are used.
A practical garage may include these zones:
| Zone | What Belongs There | Best Location |
|---|---|---|
| Everyday access | Shoes, pet supplies, reusable bags, sports gear | Near the house door |
| Lawn and garden | Rakes, shovels, soil, watering tools | Near the garage door |
| Tools and repairs | Hand tools, hardware, power tools | Around the workbench |
| Automotive | Cleaning supplies, fluids, tire tools | Near the parked vehicle |
| Seasonal storage | Holiday decorations, camping gear, winter items | Upper shelves or overhead storage |
| Household overflow | Paper goods, coolers, folding chairs | Shelving along a side or back wall |
| Kids’ equipment | Balls, helmets, scooters, outdoor toys | Low, easy-to-reach storage |
| Hazardous products | Paints, pesticides, oils, cleaners | Secure storage based on product instructions |
The exact categories matter less than the logic. Items used together should be stored together.
Professional organization guidance commonly recommends creating designated zones and using vertical storage to reduce floor clutter.
Store Items Based on How Often You Use Them
Not every shelf is equally valuable.
The easiest spaces to reach should hold items used every week. Less convenient areas can hold things used a few times each year.
Prime Storage Space
Keep these items between roughly waist and shoulder height:
- Frequently used tools
- Sports equipment
- Car-cleaning supplies
- Pet items
- Gardening gloves
- Extension cords
- Reusable shopping bags
Low Storage
Lower shelves work well for:
- Heavy containers
- Bags of soil
- Cases of drinks
- Automotive fluids
- Children’s outdoor gear
Avoid placing heavy items on upper shelves where they are difficult to lift down safely.
High Storage
Use upper shelves for lighter, less frequently used items:
- Holiday decorations
- Camping equipment
- Seasonal clothing
- Empty coolers
- Party supplies
- Backup household goods
This simple access rule makes the garage easier to maintain because common items do not need to be pulled from the back of a ceiling rack.
Use the Walls Before Filling the Floor
Vertical garage storage creates space without reducing the room available for vehicles and walking.
Useful wall storage options include:
- Pegboards
- Slatwall panels
- Track systems
- Utility hooks
- Wall-mounted shelves
- Magnetic tool strips
- Bike racks
- Hose holders
- Long-handle tool racks
Wall storage is especially effective for objects with awkward shapes. Rakes, shovels, ladders, bicycles, folding chairs, cords, hoses, and weed trimmers rarely fit neatly in ordinary bins.
Hang frequently used items where they are visible and easy to return. Outline tool positions on a pegboard or label each hook when several family members use the space.
Do not hang everything simply because a hook is available. A wall covered from floor to ceiling with overlapping equipment becomes another clutter pile, only vertical.
Use Overhead Storage Selectively
Ceiling-mounted racks can recover space that would otherwise go unused.
They work well for:
- Artificial Christmas trees
- Empty luggage
- Camping bins
- Seasonal decorations
- Folding tables
- Lightweight outdoor equipment
Overhead storage is less suitable for heavy objects, daily-use items, liquids, or containers you cannot lift comfortably while standing on a ladder.
Before installing ceiling storage, check:
- Garage-door clearance
- Vehicle height
- Lighting and opener placement
- Ceiling structure
- Rack weight limits
- Bin dimensions
- Safe ladder access
Follow the rack manufacturer’s installation and load instructions. Do not estimate how much a ceiling system can hold based on how sturdy it looks.
Seasonal items are strong candidates for ceiling storage because they otherwise consume useful wall and floor space throughout the year.
Choose Fewer Bin Sizes
Mismatched containers waste shelf space and make stacking harder.
Choose two or three bin sizes that fit your shelving system. This gives the garage a cleaner layout and makes it easier to replace or add containers later.
Use small bins for:
- Batteries
- Tape
- Fasteners
- Electrical supplies
- Picture-hanging hardware
- Car-detailing accessories
Use medium bins for:
- Sports equipment
- Garden supplies
- Power-tool accessories
- Extension cords
- Painting tools
Use large bins for:
- Holiday decorations
- Camping supplies
- Seasonal clothing
- Outdoor cushions
- Party equipment
Clear bins make it easier to see the general contents. Opaque bins hide visual clutter and protect items from light. Either choice can work if the containers are labeled clearly.
Do not create one enormous “miscellaneous” bin. That category becomes the final resting place for everything nobody wants to make a decision about.
Label Bins So You Can Find Things Quickly
Labels are what turn a collection of containers into an actual garage storage system.
Use category names that match the way you search. “Electrical” may be useful if everyone understands what belongs there. “Cords, adapters and batteries” may be clearer for the rest of the household.
Useful garage label examples include:
- Camping cooking gear
- Tent and sleeping bags
- Outdoor extension cords
- Car washing supplies
- Drill bits and drivers
- Painting tools
- Holiday lights
- Gift wrapping
- Baseball equipment
- Bike repair
- Sprinkler parts
- Work gloves
Place labels on the side that faces outward when the bin is stored. For overhead bins, consider labeling the end and bottom so the contents can be identified from below.
Custom vinyl stickers can be printed with large text, icons, or color-coded categories for garage bins, cabinets, shelves, and tool storage. Laminated vinyl is useful in garages because it can handle moisture, dust, regular handling, and changing conditions better than an unprotected paper label.
CustomStickers also has a practical guide to using stickers for organizing storage bins and shelves. One useful principle is to label items according to how you naturally look for them rather than building an overly complicated category system.
Use Color Coding Carefully
Color coding can speed up garage organization, especially when several people share the space.
For example:
- Blue: automotive
- Green: lawn and garden
- Red: tools
- Yellow: sports equipment
- Orange: camping
- Purple: holiday decorations
Add written names as well as colors. A color system becomes difficult to use when nobody remembers whether the green bin contains gardening supplies or Christmas decorations.
Color coding works best when it remains simple. Five or six broad categories are easier to maintain than a custom shade for every possible object.
Icons can also help. A small wrench, bicycle, leaf, tent, or ornament may be easier to recognize from across the garage than a line of small text.
Build a Better Tool Area
Tool organization should make the most common repairs easier.
Begin by separating tools into broad groups:
- Everyday hand tools
- Power tools
- Measuring and marking
- Cutting tools
- Electrical tools
- Automotive tools
- Painting supplies
- Fasteners and hardware
Keep the tools used most often near the center of the workbench. Less frequently used specialty tools can go in drawers, cabinets, or labeled cases.
Small hardware needs its own system. Drawer organizers, divided cases, and small labeled bins work better than a coffee can filled with random screws.
Label by useful categories such as:
- Wood screws
- Machine screws
- Wall anchors
- Nails
- Washers
- Nuts and bolts
- Picture-hanging hardware
- Electrical connectors
Avoid sorting so precisely that putting away one screw requires identifying its exact diameter, thread pitch, ancestry, and preferred climate.
The system should be accurate enough to save time without becoming another hobby.
Give Sports Equipment an Open Drop Zone
Sports equipment is often difficult to organize because it is used frequently and returned in a hurry.
Open storage usually works better than containers with tight lids.
Consider:
- Ball baskets
- Tall mesh bins
- Helmet shelves
- Bat and stick racks
- Wall hooks for bags
- Low cubbies for shoes
- Individual baskets for each child
- A drying area for wet equipment
Place the sports zone near the garage door so children do not have to carry muddy equipment across the entire space.
Make the storage easy enough that putting an item away takes one motion. A basketball is more likely to reach an open basket than a labeled bin hidden behind two bicycles.
Create a Garage Drop Zone Near the House Door
The door between the garage and house often becomes a collection point for shoes, bags, packages, keys, and pet equipment.
Turn that area into an intentional drop zone.
Include only what your household actually uses:
- Shoe rack
- Hooks for bags and jackets
- Basket for outdoor toys
- Shelf for packages
- Container for reusable bags
- Pet leash hook
- Small trash can
- Return or donation bin
A return bin is especially useful. Place store returns, borrowed items, and packages that need to be mailed in one location. Empty it when leaving the house rather than allowing those items to spread across the garage.
Keep Hazardous Products Separate
Garages commonly contain paints, cleaners, oils, batteries, fuels, and pesticides. Some of these products may be corrosive, toxic, reactive, or flammable and require special handling or disposal.
Keep hazardous products:
- In their original containers
- With labels intact
- Away from children and pets
- Separate from food and household supplies
- Upright and protected from damage
- Stored according to the manufacturer’s directions
- Away from heat or ignition sources when required
Do not pour leftover products into drink bottles or unmarked containers.
Temperature also matters. Some paints, adhesives, cleaners, batteries, and chemicals may be damaged by freezing or extreme heat. Read the storage directions before assigning them a permanent garage shelf.
For pesticides, the EPA recommends following the product label and avoiding unnecessary stockpiling.
If a product is leaking, unidentified, expired, or no longer needed, contact your local household hazardous waste program rather than placing it in ordinary trash or pouring it down a drain.
Protect Garage Labels From Wear
Garage labels may be exposed to dust, moisture, oils, sunlight, cleaning products, and frequent handling.
Apply labels to clean, smooth surfaces. Remove dirt and grease, dry the area, and press the entire sticker firmly.
For storage exposed to harsher conditions, heavy-duty vinyl stickers provide a thicker construction and higher-grade laminate for equipment, gear, vehicles, and longer-term outdoor use.
Avoid placing labels over:
- Heavy texture
- Rust
- Peeling paint
- Dust
- Oil
- Flexible fabric
- Broken plastic
- Areas repeatedly scraped by shelving
For removable or frequently changing contents, place permanent category labels on the shelf and use replaceable cards inside clear holders on the bins.
Do Not Organize Items You Should Remove
Storage products cannot solve an inventory problem.
Before buying another shelving unit, ask:
- Have we used this in the last two years?
- Does it still work?
- Does anyone know what it belongs to?
- Would we buy it again?
- Is it worth the space it occupies?
- Could it be borrowed or rented when needed?
- Is keeping it creating a safety issue?
Duplicate yard tools, half-empty containers, broken appliances, old paint, damaged furniture, empty boxes, and unidentified parts can consume a surprising amount of garage space.
Decluttering is not a separate step before organization. It is what makes organization possible.
Leave Room for the Car and Walking Paths
A garage storage plan should protect its basic function.
Mark the space needed to:
- Open vehicle doors
- Walk around the vehicle
- Reach the house door
- Access electrical panels
- Use the workbench
- Move trash and recycling bins
- Operate the garage door
- Reach emergency equipment
Painter’s tape on the floor can help define parking and storage boundaries while planning.
Keep shelves, bikes, tools, and hooks far enough from the vehicle to prevent scratches. Test the layout with the largest vehicle normally parked in the garage.
A storage system is not successful if every passenger has to exit before the vehicle can be parked.
Use a One-Minute Reset Rule
The system should make routine cleanup quick.
At the end of a project or outdoor activity, spend one minute returning the most visible items:
- Put tools back
- Hang extension cords
- Return balls to the basket
- Place scrap materials in the correct bin
- Throw away packaging
- Sweep the work area
- Move donations to the car
A one-minute reset will not produce a perfect garage. It will prevent small messes from becoming weekend projects.
Schedule a deeper review once or twice a year. Seasonal transitions are useful times to move camping equipment, winter gear, gardening supplies, and holiday decorations.
Garage Organization Mistakes to Avoid
Buying Containers Before Decluttering
You may end up purchasing storage for objects that should have been donated or discarded.
Using Only Floor Storage
Floor storage reduces parking and walking space. Use walls and upper shelves where appropriate.
Stacking Bins Too High
A stack that needs to be dismantled every time you need the bottom container will not remain organized.
Making Categories Too Broad
“Garage stuff” is not a useful label.
Making Categories Too Narrow
A separate bin for every tiny type of fastener may create more work than it saves.
Hiding Everyday Items
Frequently used objects should be visible or immediately accessible.
Ignoring Household Habits
An organization system must work for the people using it, not only for the person who designed it.
Filling Every Available Space
Leave some open capacity. A garage packed to 100 percent has nowhere to put the next item that arrives.
A Weekend Garage Organization Plan
You can make substantial progress without completing a full renovation.
Saturday Morning: Sort
Remove obvious trash and group items by category.
Saturday Afternoon: Declutter
Choose what stays, what moves, and what leaves.
Sunday Morning: Build Zones
Assign wall, shelf, cabinet, and floor areas to each major category.
Sunday Afternoon: Label and Reset
Label bins, hang equipment, place frequently used items within reach, and clear the parking area.
Do not aim for perfect matching storage on the first weekend. Build the basic system, use it for a month, and then improve the parts that create friction.
Final Thoughts
Garage organization ideas that actually work are usually simple.
Decide what the garage needs to do. Remove what does not belong. Create broad zones. Store items based on how often they are used. Use walls and upper shelves without making items difficult to retrieve.
And label everything clearly enough that the rest of the household can follow the system.
A garage does not need matching cabinets or an expensive floor coating to function well. It needs clear categories, practical storage, open walking space, and fewer objects waiting for someone else to make a decision.